Install Facebook CAPI with JENTIS
With Jentis the integration of Facebook tracking pixels CAPI (Facebook Conversion API) follows a flexible setup. Where you can define the events and parameter values you want to share with Facebook. This is a two step process. First you’ll need to define the events and requirements to meet your business needs and set those up in Facebook business manager. Next you will configure the Jentis tracking to technically define when to submit the data of your website visitors.
Create a Second Pixel
If you want to have a parallel Pixel setup, so the new architecture can be compared to the legacy implementation, you can go ahead an create a new Pixel. With JENTIS you will then just use this new pixel, so the data source is unambiguous setup.
For that you need to navigate in your Facebook Business account to the event manager:
Here you select “Connect data sources” and create a new Web pixel. Give it a name and select the Conversion API and Web Pixel as a source.
With this pixel ID you can now go ahead and configure the JTM.
Facebook CAPI Setup
The first step is to define the requirements to meet your business goals. This also includes the definition of what events from your website visitors will be shared with Facebook. Here we will guide you through the pixel setup, CAPI activation, event and parameter definition and later the reporting of received data.
Pixel Setup
Navigate to your Facebook Business page at https://business.facebook.com/
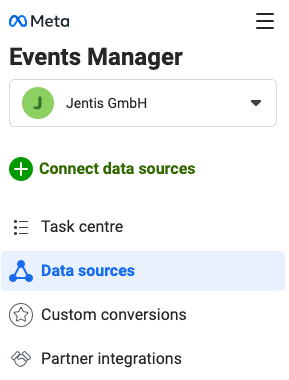
Here select your Business account and navigate to “Data Sources” tab.

There can be multiple tracking pixel already setup. You can either create a new pixel for the CAPI tracking or add the CAPI tracking to an existing pixel.
The Jentis Tag Manager will track events frontend (classic pixel tracking) and CAPI tracked events. So the pixel you select (new or existing) will report events from CAPI and frontend at the same time.
a) Creating a new pixel: You will see the events that you track with your existing setup in a different pixel setup than the one implemented with Jentis. Both can run in parallel without interfering with each other.
b) Use existing pixel: You will see the new events from Jentis reporting next to the events from your existing setup. For deduplication either the existing setup must be deactivated at the moment the new setup goes live (and thus the JTM must be setup to track all the same events) or a Facebook internal parameter is used for deduplication.

Select the Pixel ID that you want to integrate with JTM. Here in the settings tab you can choose to set up Conversion API manually. Click “Get Started”.
Conversion API Activation
You can either first activate the CAPI or setup the events and later activate the CAPI. In this guide we navigate to activate the Conversion API first.

On a pixel overview you can select to “Manage Integrations” and there access the Conversion API setup.
Here you will need to generate the access token. Copy and save the value, you will need it in a later step. If you lose the access token you will need to generate a new one. Facebook will not save the access token that you generated.

The access token can also be generated in a later step or a new token can be generated at any time later. This will make the old token invalid.
Test Event Code
Facebook CAPI provides a special parameter to identify and trace events that are coming from a test setup. When previewing your Jentis version you can use this to see in real time data arriving from Jentis in your Facebook account.
Navigate to the “Test events” section of your Pixel ID. Here a test code will be provided:
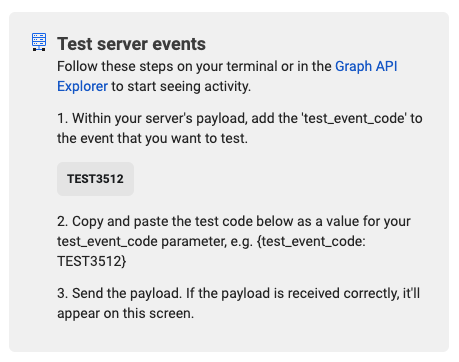
Copy the value (“TEST…”) that is displayed to you, this will be required in a later step.
Event Setup
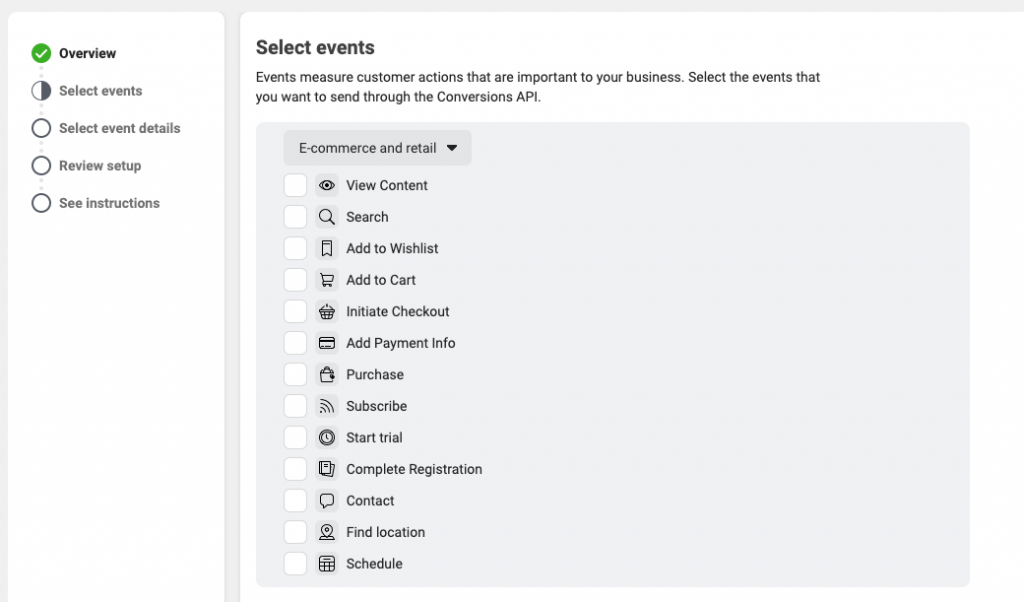
For this step you will need to align your business goals with the tracking requirements. Select the events that are required and will be sharing information with Facebook. This will also contain personally identifiable information (PII) so act carefully in line with legal and other business aspects.
In the event setup for the conversion API you can select descriptive events, such as Purchase or Lead. The parameters for each event will be defined in the next step.
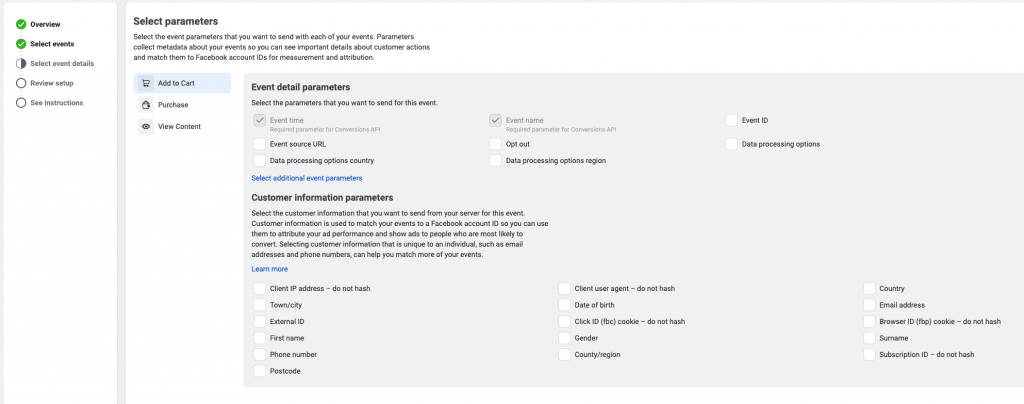
The event details are parameters that you would like to share with Facebook. In the later Jentis implementation you will need to provide this parameters for tracking.
The parameters “External ID2”, “Click ID (fbc) cookie” and “Browser ID (fbp) cookie” will be provided by Jentis. If you decide to share this parameters select them for each event. Make sure to also select further parameters, such as email, ip or other if you decide to transmit them in your tracking setup.
Confirm the setup after configuring each event in detail.
The setup is now finished and you can start the implementation of your tracking with Jentis.
Reporting and Data-Quality Assurance
Every Pixel ID in Facebooks Data Sources tab will report basic information. This includes the total count of received events per event type. For CAPI this reports will also include messages that report notifications and errors. Also a event match quality is reported that is based on an internal definition.
Please note: total event count for frontend tracking pixel and CAPI pixel event count will not match in total numbers. Even for the same event type, ie. “Pageview”. This is due to different data processing streams in Facebook. The count of events for frontend pixel is a raw count, where as the count of events in CAPI is a filtered value that is processed first before reporting.
Jentis Facebook Tracking Implementation
The Jentis Tag Manager includes a Tracker configuration that takes care of a full Facebook setup. Meaning a component that starts tracking on the frontend and submitting data to Facebook in a third party context and a server side component to submit first-party data. This architecture ensures that the most data points and events arrive on Facebooks site.
In this guide we will show you how to configure and implement the required parts for the Facebook CAPI tracking. The steps required are:
- Create and Configure a Facebook Tracker.
- Track required data frontend.
- Submit data in CAPI tags to Facebook with Tags and Triggers.
Create and Configure the Facebook Tracker
Each data receiving endpoint is managed in a Tracker object in your Jentis Tag Manager account.
Navigate to the “Tracker” section in Server Tag Management in JTM. There create a new tracker and select Facebook.

On the next step you will need to define the static and mandatory parameters for the setup.
Fill in the Pixel ID and Access Token values that you received in the previous steps (configuring the CAPI in Facebook data source settings).
The Partner-Aget String and Test event code values can be defined with any value. This is only used for debugging and is not required for the productive setup.
When a test code value (as generated in the earlier step in Facebook) is provided it will be send with your setup. Use this to debug data with Facebook in realtime, you can see data arriving in that case from Jentis if you use the test code value as provided to you by Facebook in the previous steps.

Frontend Tracking Setup
To submit data to Facebook you will need to check the already available data points in Jentis and if further parameters, values and events are required to meet your business goals with the Facebook CAPI setup.
General events and parameters can be added to your Jentis frontend implementation any time. Follow the basic guide to submit data from any web application to Jentis: my.jentis.com/manual-setup
Further the tracking of personally identifiable information (PII) is often requested with Facebook. In that case you must make sure to submit any PII parameter as a hashed value. Follow the Facebook CAPI guide to align to the hashing algorithm requirements. Submit only hashed PII values to Jentis.
In the following example an event is triggered to submit an event with Jentis. This event contains the email address as a hashed value and it is triggered on a form submit.
var emh = sha256(mail@address.com); // do not run - only visual example

// this call submits an event to the JTM server with the PII data
_jts.push({
  "track"     :   "event",
  "group"     :   "fbpii",
  "name"      :   "emh",
  "emh"       :   emh         // the "emh" parameter will contain the hashed mail value
});
Adjust this code according to your frontend implementation. Either by creating a frontend plugin in JTM that pushes the required PII-data and submitting an event, or by requesting such an implementation with your web application.
After implementing this event you should see the data received in the preview mode. Make sure that all required events and data points are implemented as required at this stage.

In our example here we can see the event submitted to the JTM server in the preview. Here the documentType “event” has a property “emh” that contains the email hash value. This way we can be sure the data is received by the JTM server.
The next step is to submit this data to a partner, such as the Facebook CAPI integration.
Server Side Tag and Trigger Setup
Whenever data is received on the server side in Jentis you can define how your setup should treat it. Therefore Tags and Triggers are available on the server. The Tags are configuration objects that define which parameter has which value. And the Triggers define the conditions that must be met to activate a tag and there submit data to any internal or third party endpoint.
Tag Setup
In Jentis Server Tag Manager navigate to Tags. There create a new tag. Here you’ll need to select the Tracker (Facebook, in the previous step created Tracker object) and the template. This template corresponds to your business requirement and events that you generated in your Facebook CAPI setup. For each event that you setup in the Facebook CAPI you will need to create a tag in Jentis.
Here we will create a tag for the event that transmits the email hash value. In this configuration example the frontend event will trigger a “Lead” event in Facebook. So a tag for the Facebook tracker with the template “Lead” must be created. The “Email” parameter field in this tags setup will reference the event property “emh” (which contains the email hash value, as described in the previous steps).
Also the parameters “Facebook click id” and “Facebook browser id” are setup in this example. Next to all the other required parameters (such as Pixel ID and Access token, which are referencing the Tracker properties, as created in the previous step).

Trigger Setup
Each tag must have a trigger to actually submit data to the desired partners endpoint. Triggers contain condition definitions that are checked on every event that is submitted to the Jentis server. If a triggers conditions are met the tag is activated and submits data to the defined Tracker.
To activate the tag that we configured in the previous step we create a trigger with the following conditions.
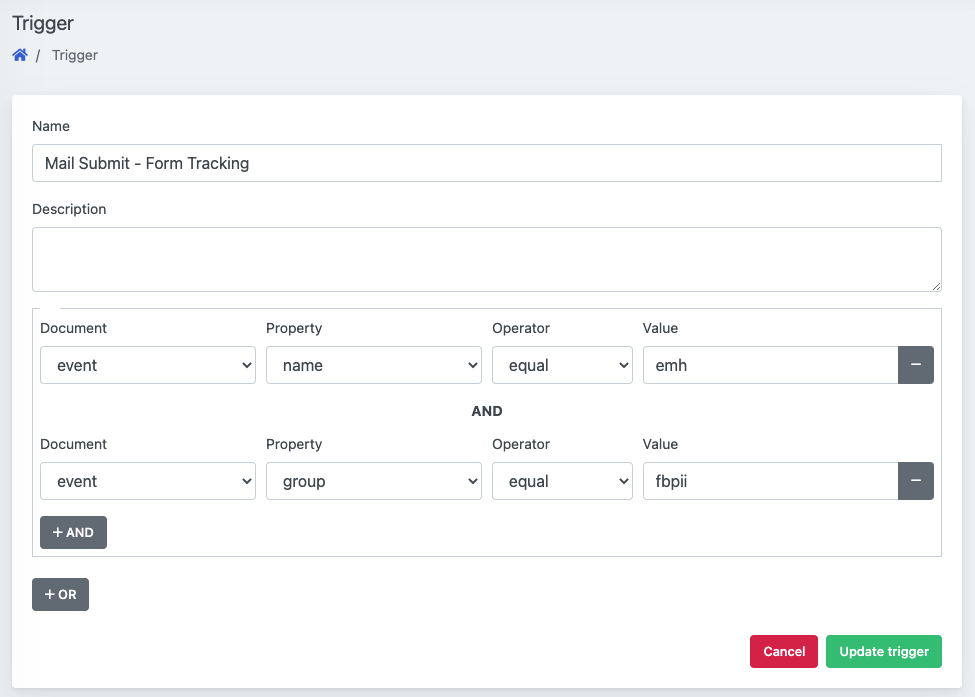
Now every time the event and email hash value is submitted to the Jentis server the configured tag will run and submit data to Facebook.
In the preview we can also check if this is all running as expected. In the Facebook tag preview we can see all the parameters submitted to the Facebook CAPI. The user_data object contains a parameter “em” that must contain the hashed string value of the email address.
In our test case this matches the submitted parameter “emh” value (as shown in the previous steps).

Now all the required data is submitted to Facebook as expected.